centos 7.2 安装Nginx和nginx-rtmp-module搭建直播流媒体服务器

本机安装目录

/usr/share/

1、在当前目录下载同版本的Nginx

cd /usr/share/

wget http://nginx.org/download/nginx-1.12.2.tar.gz

tar -zxvf nginx-1.12.2.tar.gz

2、更新下依赖相关包

yum -y install pcre*

3、下载nginx-rtmp-module

cd /usr/share/

git clone https://github.com/arut/nginx-rtmp-module.git

mv nginx-rtmp-module nginx-rtmp-module-1.1.10

4、进入nginx-1.12.2目录

cd /usr/share/nginx-1.12.2

5、编译模块

./configure --prefix=/usr/local/nginx --add-module=../nginx-rtmp-module-1.1.10 --with-

http_ssl_module

make #验证

make install
6、启动Nginx

cd /usr/local/nginx

./sbin/nginx

Nginx安装成功.jpg
7、配置conf

参考资料
github:《nginx-rtmp-module》https://github.com/arut/nginx-rtmp-module

复制一份副本

cp /usr/local/nginx/conf/nginx.conf /usr/local/nginx/conf/nginx.conf.bak

编辑配置

vi /usr/local/nginx/conf/nginx.conf

rm -rf /usr/local/nginx/conf/.nginx.conf.swp

在events {}下面添加以下代码
参考《Nginx.conf》
nginx.rar

rtmp_auto_push   on; # Multi-Worker

rtmp {
    server {
        listen      1935;
        chunk_size 4096;   #//数据传输块的大小
        allow play all;


        application live {
             live             on;  # 启用rtmp
             #publish_notify   on;  # 启用notify

             # on_publish       http://127.0.0.1/notify/publish;
             # on_play          http://127.0.0.1:8080/rtmp/notify/play;
             # on_play_done     http://127.0.0.1:8080/rtmp/notify/play_done;
             # on_publish_done  http://127.0.0.1/notify/publish_done;
             # on_record_done   http://127.0.0.1:8080/rtmp/notify/record_done;
             # on_update        http://127.0.0.1:8080/rtmp/notify/update;

             hls              on;  # 启用hls
             wait_key on;          #对视频切片进行保护,这样就不会产生马赛克了
             hls_path   /www/web/default/live; #切片视频文件存放位置
             hls_fragment    10s; #每个视频切片的时长
             hls_continuous on; #连续模式
             hls_cleanup on;    #对多余的切片进行删
            # hls_plahls_nested on;     #嵌套模式

          
            record           all;
            record_path      /www/web/default/vod;  # 录制保存地址
           #record_append  on;
            record_unique  on;

            #record keyframes;
            #record_path /www/web/default/vod;
            #record_max_frames 100;
            #record_interval 20m;
            
            #exec /usr/local/ffmpeg-3.4-64bit-static/ffmpeg -i rtmp://localhost/live/$name -threads 1 -c:v libx264 -profile:v baseline -b:v 350K -s 640x360 -f flv -c:a aac -ac 1 -strict -2 -b:a 56k rtmp://localhost/live360p/$name;

             # 跟踪客户信息
             exec_play bash -c "echo $addr $pageurl >> /tmp/clients";
             exec_publish bash -c "echo $addr $flashver >> /tmp/publishers";
             # 转换录制的文件格式的MP4
             # exec_record_done /usr/local/ffmpeg-3wp:4-64bit-static/ffmpeg -y -i $path -acodec libmp3lame -ar 44100 -ac 1 -vcodec libx264 $dirname/$basename.mp4;
        }

#       application live360p {
#             live           on;
#             hls            on;  # 启用hls
#             hls_path       /home/live360p;
#             record         off;
#             allow publish  127.0.0.1;
#             deny publish   all;
#        }
    }
}

在http{}前

8、nginx相关命令

/usr/local/nginx/sbin/nginx -s reload #重载配置

/usr/local/nginx/sbin/nginx -s stop #停止

/usr/local/nginx/sbin/nginx #开启

9、添加端口开放

查看端口是否开放

firewall-cmd --query-port=1935/tcp

永久开放

firewall-cmd --permanent --zone=public --add-port=1935/tcp

重启防火墙

systemctl restart firewalld.service

10、设置开机启动

vi /lib/systemd/system/nginx.service

服务代码描述:

[Unit]
Description=nginx
After=network.target
[Service]
Type=forking
ExecStart=/usr/local/nginx/sbin/nginx
ExecReload=/usr/local/nginx/sbin/nginx -s reload
ExecStop=/usr/local/nginx/sbin/nginx -s quit
PrivateTmp=true
[Install]
WantedBy=multi-user.target

保存后重载下服务

systemctl daemon-reload

命令详解:

systemctl enable nginx.service #启动服务
systemctl status nginx.service #查看服务状态
systemctl start nginx.service #开启服务
systemctl stop nginx.service #停止服务
systemctl restart nginx.service #重启服务

11、检查推流端口是否正常

cmd

telnet 140.143.157.56 1935
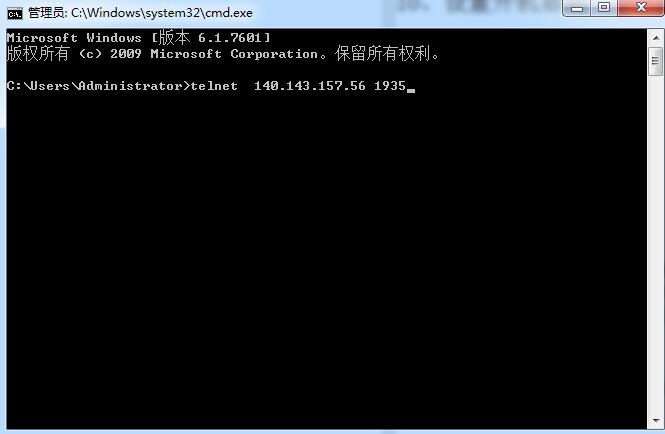
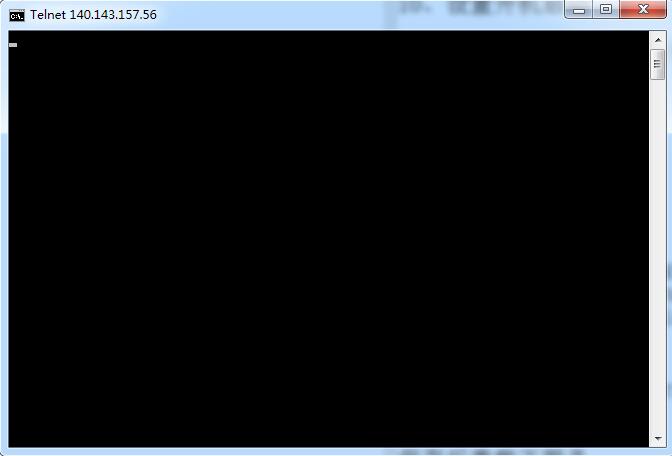
检查端口是否正常.jpg
检查端口是否正常-1.jpg

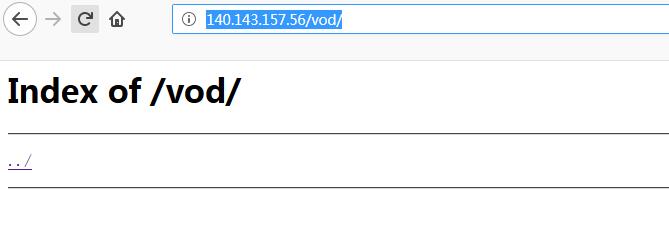
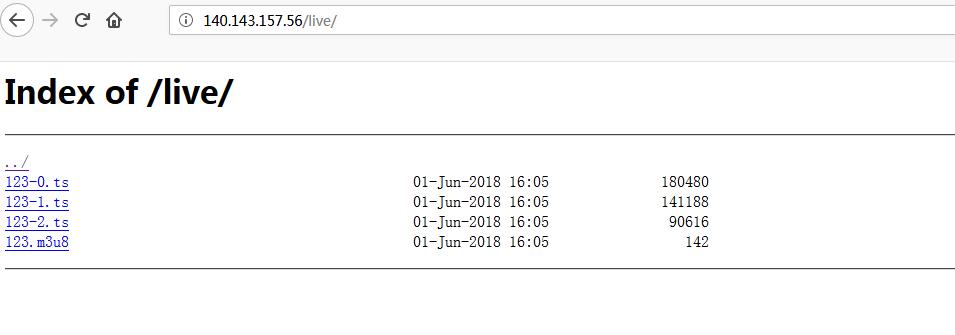
12、直播目录

live /www/web/default/live

vod /www/web/default/vod

13、推流地址

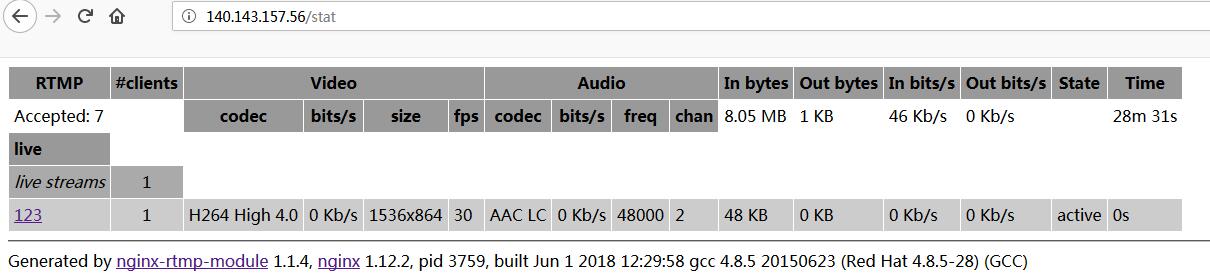
直播地址:rtmp://140.143.157.56/live/

串码:1111
结束-1.jpg
结束-2.jpg
结束-3.jpg

用惯了windows的人,会习惯性地按Ctrl+S来保存,
当你在使用vi insert 保存应该用 命令模式--wq退出 而不是ctrl+s
估计你就是这么做的.
而该举动在vi中的结果就是将vi冻住
用Ctrl+Q可以解冻

1、添加Nginx存储库

sudo yum install epel-release

2、安装Nginx

sudo yum install nginx

3、启动Nginx

sudo systemctl start nginx

4、添加到防火墙

sudo firewall-cmd --permanent --zone=public --add-service=http
sudo firewall-cmd --permanent --zone=public --add-service=https
sudo firewall-cmd --reload

注意:firewall is not running

这里启动下防火墙

systemctl start firewalld

开放端口
firewall-cmd --permanent --add-port=80/tcp
firewall-cmd --permanent --add-port=443/tcp
firewall-cmd --permanent --add-port=22/tcp
firewall-cmd --permanent --add-port=21/tcp
firewall-cmd --permanent --add-port=23560/tcp
firewall-cmd --permanent --add-port=8080/tcp
firewall-cmd --permanent --add-port=33481/tcp

5、安装成功后的Nginx地址

/usr/share/nginx/html/ 站点目录
/etc/nginx/conf.d/ 自定义Nginx站点配置文件存放目录
/etc/nginx/nginx.conf 全局配置
nginx -c nginx.confN ginx启动

6、查看nginx版本

nginx -V

查看到是:nginx/1.12.2

返回到Nginx的目录

cd /usr/share/

停止Nginx

systemctl stop nginx

启动Nginx

systemctl start nginx

卸载Nginx

yum remove nginx

笔记:
开启防火墙
systemctl start firewalld
关闭防火墙
systemctl stop firewalld
禁用防火墙服务
systemctl make firewalld

添加规则:

开放80端口

firewall-cmd --permanent --add-port=80/tcp

开放443端口

firewall-cmd --permanent --add-port=443/tcp

开放22端口

firewall-cmd --permanent --add-port=22/tcp

开放21端口

firewall-cmd --permanent --add-port=21/tcp

开放23560端口

firewall-cmd --permanent --add-port=23560/tcp

开放8080端口

firewall-cmd --permanent --add-port=8080/tcp

【旧防火墙机制】
安装iptables
yum -y install iptables-services
开启iptables
systemctl enable iptables

最近小鱼哥要做个标签模糊查询的需求。

比如标签值:

tags:广州建站,番禺建站,企业建站

我想查询所有新闻Tags字段含有以上任意一个关键词的记录,怎么实现呢?

$tags =array("广州建站","番禺建站");

重组查询条件,因为模糊查询的like 关键词两边要追加“%”;

$map =array();
foreach($tags as $k=>$v){
 $map[$k] ="%".$v."%";
}
$where['tags'] =array('like',$diff,'or');

以上得出的sql语句是
示例表为t_news 查询出6个记录 语法如下

**SELECT * FROM `t_news` WHERE (`tags` LIKE '广州建站' OR `tags` LIKE '番禺建站') ORDER BY update_time DESC LIMIT 6**

好了以上的查询就可以应用到thinkphp中去了。

【photoswipe实例源码】
PhotoSwipe Demo.rar

1.jpg
点击其中一张照片可放大,可支持图片文字描述:
2.jpg
支持分享
3.jpg
支持手势放大缩小
4.jpg
使用js框架是PhotoSwipe。
PhotoSwipe是一个图片放大插件,兼容pc和移动端,经历过多个版本的迭代且一直在不断更新,踩过的坑不知凡几,在移动端有着巨大的优势。
1、可控制多种风格如:
标题、分享、全屏按钮,点击事件、是否加入字幕,背景透明等。
2、可支持移动端触摸手势兼容pc端
所有的基本手势支持:滑动下一个或上一个,拖动平移、缩放、放大或关闭,点击切换控件,双击放大或缩放。
3、分享
默认的UI有一个按钮,分享链接。默认的链接是facebook,推特和Pinterest,但你可以通过API设置分享类型。
4、用户界面
用户界面是完全从核心脚本分离。完全可以自定义界面。默认photoswipe UI是响应式的,桌面、平板电脑和移动设备完全可以使用。

5、更多功能等你发现。

官网:http://photoswipe.com/

github:https://github.com/dimsemenov/photoswipe

如何使用?

1、在官网下载PhotoSwipe,在页面中引入

<link rel="stylesheet prefetch" href="css/photoswipe.css">
<link rel="stylesheet prefetch" href="css/default-skin/default-skin.css">
<script src="js/photoswipe.js"></script>
<script src="js/photoswipe-ui-default.min.js"></script>

2、页面中必须加入以下代码结构(此结构是插件图片浏览必须代码,作者并没有集成到js中,所以使用者必须手动加入自己的网页中):

<!-- Root element of PhotoSwipe. Must have class pswp. -->
<div class="pswp" tabindex="-1" role="dialog" aria-hidden="true">

    <!-- Background of PhotoSwipe. 
         It's a separate element as animating opacity is faster than rgba(). -->
    <div class="pswp__bg"></div>

    <!-- Slides wrapper with overflow:hidden. -->
    <div class="pswp__scroll-wrap">

        <!-- Container that holds slides. 
            PhotoSwipe keeps only 3 of them in the DOM to save memory.
            Don't modify these 3 pswp__item elements, data is added later on. -->
        <div class="pswp__container">
            <div class="pswp__item"></div>
            <div class="pswp__item"></div>
            <div class="pswp__item"></div>
        </div>

        <!-- Default (PhotoSwipeUI_Default) interface on top of sliding area. Can be changed. -->
        <div class="pswp__ui pswp__ui--hidden">

            <div class="pswp__top-bar">

                <!--  Controls are self-explanatory. Order can be changed. -->

                <div class="pswp__counter"></div>

                <button class="pswp__button pswp__button--close" title="Close (Esc)"></button>

                <button class="pswp__button pswp__button--share" title="Share"></button>

                <button class="pswp__button pswp__button--fs" title="Toggle fullscreen"></button>

                <button class="pswp__button pswp__button--zoom" title="Zoom in/out"></button>

                <!-- element will get class pswp__preloader--active when preloader is running -->
                <div class="pswp__preloader">
                    <div class="pswp__preloader__icn">
                      <div class="pswp__preloader__cut">
                        <div class="pswp__preloader__donut"></div>
                      </div>
                    </div>
                </div>
            </div>

            <div class="pswp__share-modal pswp__share-modal--hidden pswp__single-tap">
                <div class="pswp__share-tooltip"></div> 
            </div>

            <button class="pswp__button pswp__button--arrow--left" title="Previous (arrow left)">
            </button>

            <button class="pswp__button pswp__button--arrow--right" title="Next (arrow right)">
            </button>

            <div class="pswp__caption">
                <div class="pswp__caption__center"></div>
            </div>

        </div>

    </div>

</div>

3、需要浏览的图片加入photoswipe结构代码,这里需要注意的是
data-pswp-uid在每个相册中必须是唯一的,data-size是指定放大时图片显示的宽和高,若指定的宽高与图片不符会导致显示的图片变形;目前还没找到去掉
data-size的办法,但然有时间可以找下替代办法。

<!--data-pswp-uid在每个相册中必须是唯一的,data-size指定放大时图片显示的宽和高-->
<div class="my-gallery" data-pswp-uid="1">
  <figure>
                              <a href="img/m3.jpg" data-size="670x712">
                              <img src="img/th1.jpg">
                              </a>
                            </figure>
</div>

4、加入js代码,此代码作者也没有集成到photoswipe框架中,需要自己手动加入网页里
<script type="text/javascript">

var initPhotoSwipeFromDOM = function(gallerySelector) {

// 解析来自DOM元素幻灯片数据(URL,标题,大小...)
// (children of gallerySelector)
var parseThumbnailElements = function(el) {
    var thumbElements = el.childNodes,
        numNodes = thumbElements.length,
        items = [],
        figureEl,
        linkEl,
        size,
        item;

    for(var i = 0; i < numNodes; i++) {

        figureEl = thumbElements[i]; // <figure> element

        // 仅包括元素节点
        if(figureEl.nodeType !== 1) {
            continue;
        } 25             linkEl = figureEl.children[0]; // <a> element
        
        size = linkEl.getAttribute('data-size').split('x');

        // 创建幻灯片对象
        item = {
            src: linkEl.getAttribute('href'),
            w: parseInt(size[0], 10),
            h: parseInt(size[1], 10)
        };
        if(figureEl.children.length > 1) {
            // <figcaption> content
            item.title = figureEl.children[1].innerHTML; 
        }

        if(linkEl.children.length > 0) {
            // <img> 缩略图节点, 检索缩略图网址
            item.msrc = linkEl.children[0].getAttribute('src');
        } 

        item.el = figureEl; // 保存链接元素 for getThumbBoundsFn
        items.push(item);
    }

    return items;
};

// 查找最近的父节点
var closest = function closest(el, fn) {
    return el && ( fn(el) ? el : closest(el.parentNode, fn) );
};

// 当用户点击缩略图触发
var onThumbnailsClick = function(e) {
    e = e || window.event;
    e.preventDefault ? e.preventDefault() : e.returnValue = false;

    var eTarget = e.target || e.srcElement;

    // find root element of slide
    var clickedListItem = closest(eTarget, function(el) {
        return (el.tagName && el.tagName.toUpperCase() === 'FIGURE');
    });

    if(!clickedListItem) {
        return;
    }

    // find index of clicked item by looping through all child nodes
    // alternatively, you may define index via data- attribute
    var clickedGallery = clickedListItem.parentNode,
        childNodes = clickedListItem.parentNode.childNodes,
        numChildNodes = childNodes.length,
        nodeIndex = 0,
        index;

    for (var i = 0; i < numChildNodes; i++) {
        if(childNodes[i].nodeType !== 1) { 
            continue; 
        }

        if(childNodes[i] === clickedListItem) {
            index = nodeIndex;
            break;
        }
        nodeIndex++;
    }
    if(index >= 0) {
        // open PhotoSwipe if valid index found
        openPhotoSwipe( index, clickedGallery );
    }
    return false;
};

// parse picture index and gallery index from URL (#&pid=1&gid=2)
var photoswipeParseHash = function() {
    var hash = window.location.hash.substring(1),
    params = {};

    if(hash.length < 5) {
        return params;
    }

    var vars = hash.split('&');
    for (var i = 0; i < vars.length; i++) {
        if(!vars[i]) {
            continue;
        }
        var pair = vars[i].split('=');  
        if(pair.length < 2) {
            continue;
        }           
        params[pair[0]] = pair[1];
    }

    if(params.gid) {
        params.gid = parseInt(params.gid, 10);
    }

    return params;
};

var openPhotoSwipe = function(index, galleryElement, disableAnimation, fromURL) {
    var pswpElement = document.querySelectorAll('.pswp')[0],
        gallery,
        options,
        items;

    items = parseThumbnailElements(galleryElement);

    // 这里可以定义参数
    options = {
      barsSize: { 
        top: 100,
        bottom: 100
      }, 
       fullscreenEl : false, // 是否支持全屏按钮
        shareButtons: [
        {id:'wechat', label:'分享微信', url:'#'},
        {id:'weibo', label:'新浪微博', url:'#'},
        {id:'download', label:'保存图片', url:'{{raw_image_url}}', download:true}
        ], // 分享按钮

        // define gallery index (for URL)
        galleryUID: galleryElement.getAttribute('data-pswp-uid'),

        getThumbBoundsFn: function(index) {
            // See Options -> getThumbBoundsFn section of documentation for more info
            var thumbnail = items[index].el.getElementsByTagName('img')[0], // find thumbnail
                pageYScroll = window.pageYOffset || document.documentElement.scrollTop,
                rect = thumbnail.getBoundingClientRect(); 

            return {x:rect.left, y:rect.top + pageYScroll, w:rect.width};
        }

    };

    // PhotoSwipe opened from URL
    if(fromURL) {
        if(options.galleryPIDs) {
            // parse real index when custom PIDs are used 
            for(var j = 0; j < items.length; j++) {
                if(items[j].pid == index) {
                    options.index = j;
                    break;
                }
            }
        } else {
            // in URL indexes start from 1
            options.index = parseInt(index, 10) - 1;
        }
    } else {
        options.index = parseInt(index, 10);
    }

    // exit if index not found
    if( isNaN(options.index) ) {
        return;
    }

    if(disableAnimation) {
        options.showAnimationDuration = 0;
    }

    // Pass data to PhotoSwipe and initialize it
    gallery = new PhotoSwipe( pswpElement, PhotoSwipeUI_Default, items, options);
    gallery.init();
};

// loop through all gallery elements and bind events
var galleryElements = document.querySelectorAll( gallerySelector );

for(var i = 0, l = galleryElements.length; i < l; i++) {
    galleryElements[i].setAttribute('data-pswp-uid', i+1);
    galleryElements[i].onclick = onThumbnailsClick;
}

// Parse URL and open gallery if it contains #&pid=3&gid=1
var hashData = photoswipeParseHash();
if(hashData.pid && hashData.gid) {
    openPhotoSwipe( hashData.pid ,  galleryElements[ hashData.gid - 1 ], true, true );
}
};

// execute above function
initPhotoSwipeFromDOM('.my-gallery');

</script>